Home-made aloe vera gel in a glass in front of an aloe vera plant
This is what the home-made aloe vera gel looks like at the end.

Make your own aloe vera gel. This is the best method.

Did you know that you can use the gel from aAloe Veraeasily harvest them yourself? In this article you will find a video and step-by-step instructions on how to do this.

Aloe vera is a plant that is valued not only for its beauty, but also for its healing properties. The gel contained in the leaves of aloe vera can have a soothing effect on skin irritations, sunburn, insect bites and even burns. Instead of buying expensive aloe vera gel in the shops, you can easily make it yourself. In this article, we show you how to make your own effective gel from fresh aloe vera leaves. You will see that it is not difficult at all and that you can save a lot of money with homemade aloe vera gel.
Watch a video on how to make aloe vera gel

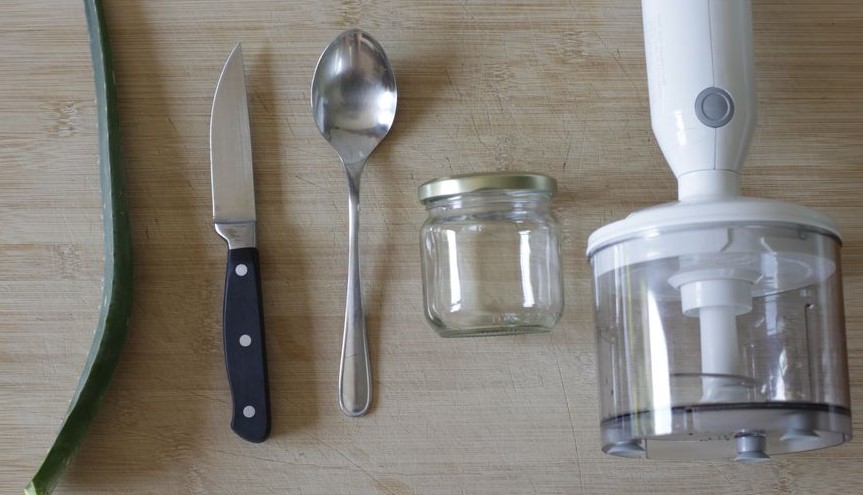
What you need to make your aloe vera gel

  1. EinAloe VeraLeaf from which the gel is extracted
  2. A sharp knife for cutting and separating the leaf
  3. A jar or other container in which you would like to store your gel
  4. A blender (optional) to turn the gel into a homogeneous mass

To ensure that your gel is as durable as possible, it is advisable to disinfect the utensils before use.

Aloe vera leaf, knife, spoon, tin, blender on a worktop
You will need these utensils to make the gel

Step-by-step instructions for making your own aloe vera gel

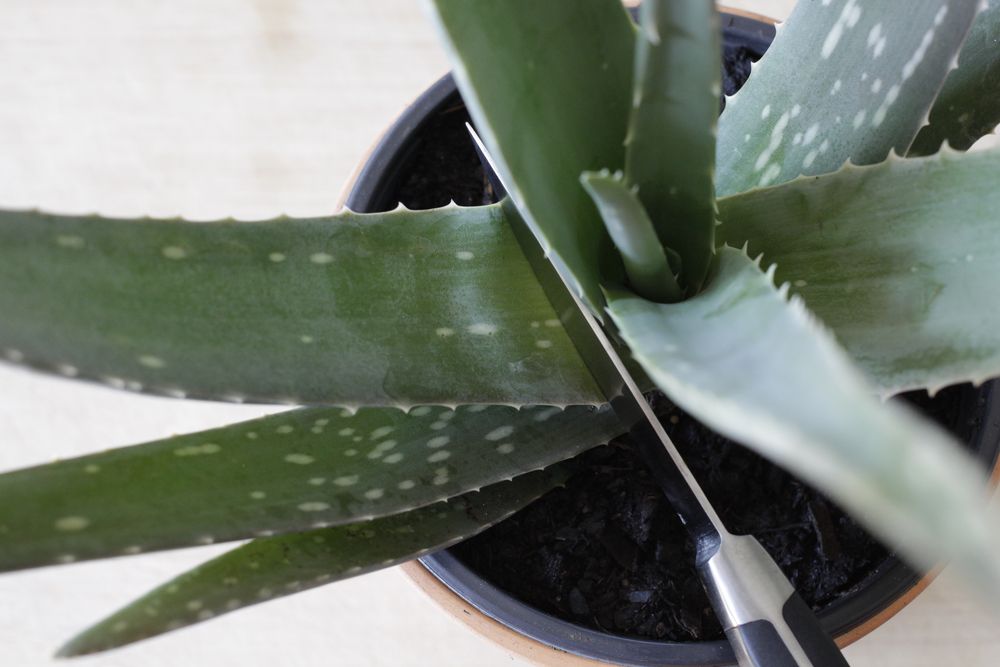
Aloe vera plant with a knife placed close to the center of the plant
Cut the leaf as far down as possible

1. choose the right leaf and cut it off as far down as possible.

Production begins with the procurement of a suitable sheet. You canAloe Veraleaves can be found in many organic supermarkets. These are just as suitable for making aloe vera gel as a leaf from your own plant. If you use your own plant, make sure that it is not too small and that the leaf you remove does not damage the plant too much. As a rough guide, a minimum number of approx. 12 leaves applies here. The selected leaf should also not be smaller than approx. 25 cm. Otherwise you will end up with very little aloe vera gel.

Cut aloe vera leaf standing in a glass, from which the aloin runs out in the form of yellow juice
Place the leaf upright in a glass and allow the aloin to drain for at least 60 minutes

2. drain the aloin from the leaf to remove it from the aloe vera

The yellow juice that comes out of the aloe vera leaf immediately after it is cut off, as well as from the cut surface, contains aloin. This should not be contained in our aloe vera gel, as it can have a laxative effect if consumed and can also have negative effects if used in other ways. You can simply drain the aloin from the leaf. To do this, place it upright in a glass and wait for approx. 90 minutes.

Aloin is a bitter substance found in the leaves of aloe vera and is responsible for the plant's characteristic taste and smell. Aloin is also used as a laxative, but can be harmful to health if consumed in excess.

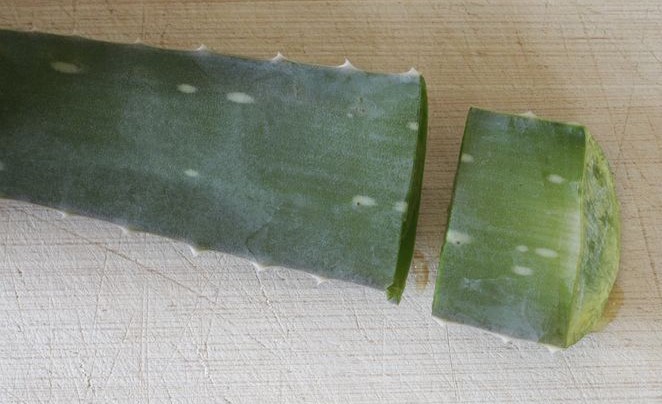
Aloe vera leaf with the last centimeter cut off
Cut off the bottom 1-2cm of the leaf to remove the remaining aloin

3. remove the bottom 1-2cm of the aloe vera leaf

Even if no more yellow juice runs out of the leaf, there is still aloin in the lowest part. To remove this, cut off the bottom 1-2 cm of the leaf.

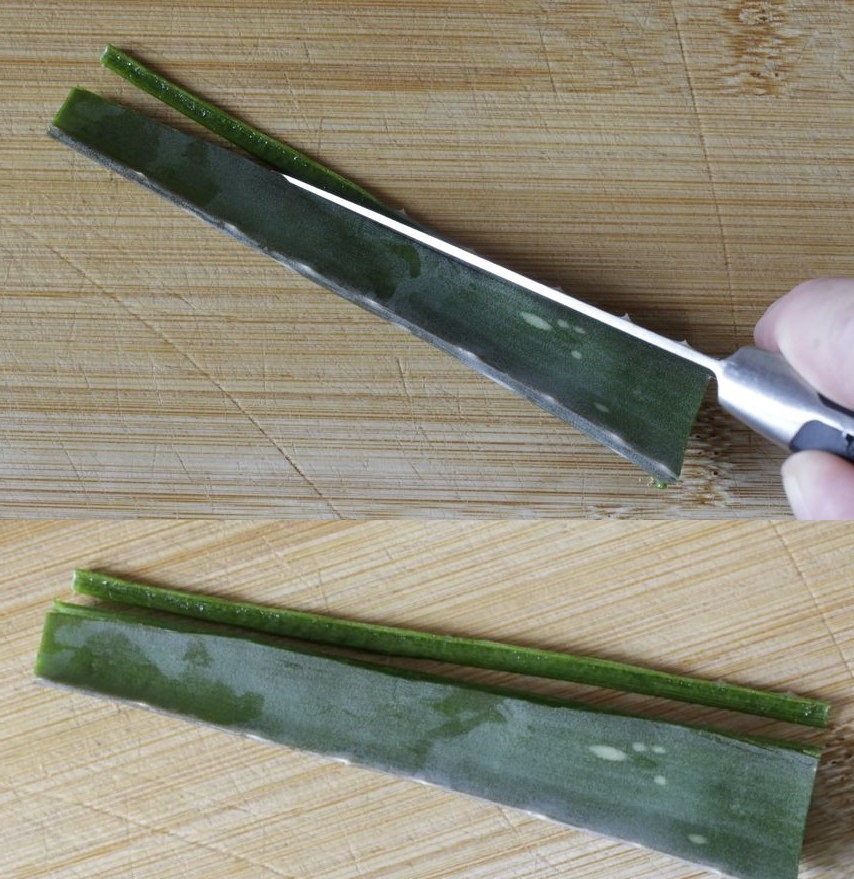
Aloe vera leaf, which is cut open at the sides to get to the gel it contains
Now cut off the edges of the leaf to get to the gel inside.

4. cut the edges of the aloe vera leaf lengthwise

In our experience, removing the edges of the leaf has proven to be the best way to get at the gel. In other instructions, peelers are used to remove the skin of the leaf. However, this often results in a gel contaminated with peel residue and is impractical, especially with larger aloe vera leaves.

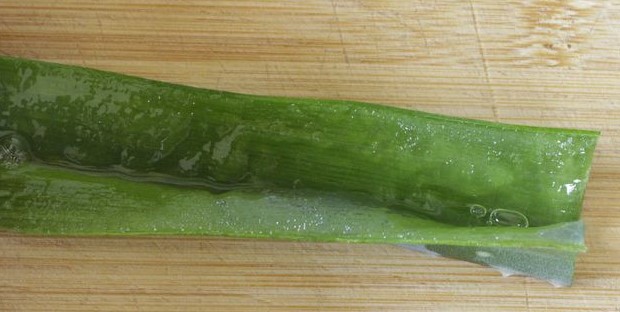
Aloe vera leaf, which is cut open at the sides to get to the gel it contains
Now separate the two halves of the aloe vera leaf

5. open aloe vera leaf

Once the edges of the leaf have been removed, you can unfold the leaf. This will reveal the gel from the plant that we want to extract.

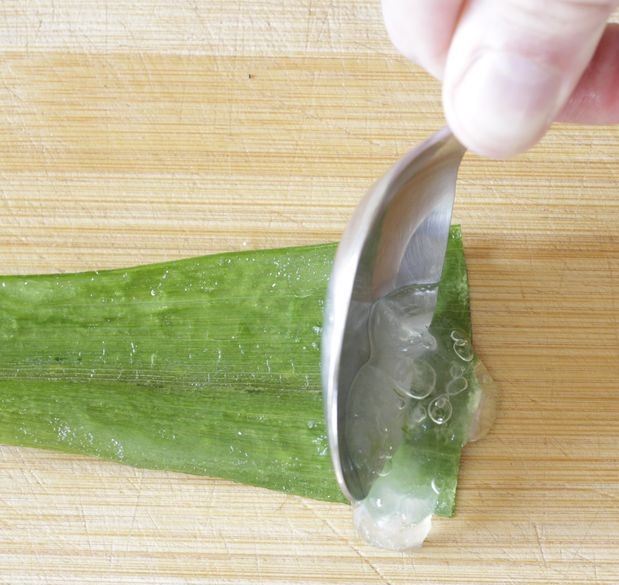
Aloe vera gel is scraped out of the opened aloe vera leaf using a spoon and gentle pressure
Scrape the aloe vera gel out of the leaf halves with little pressure

6. scrape the aloe vera gel from the leaf

The aloe vera gel is now exposed and can be carefully scraped out of the leaf halves with a spoon. Do not apply too much pressure, otherwise parts of the peel may end up in your gel.

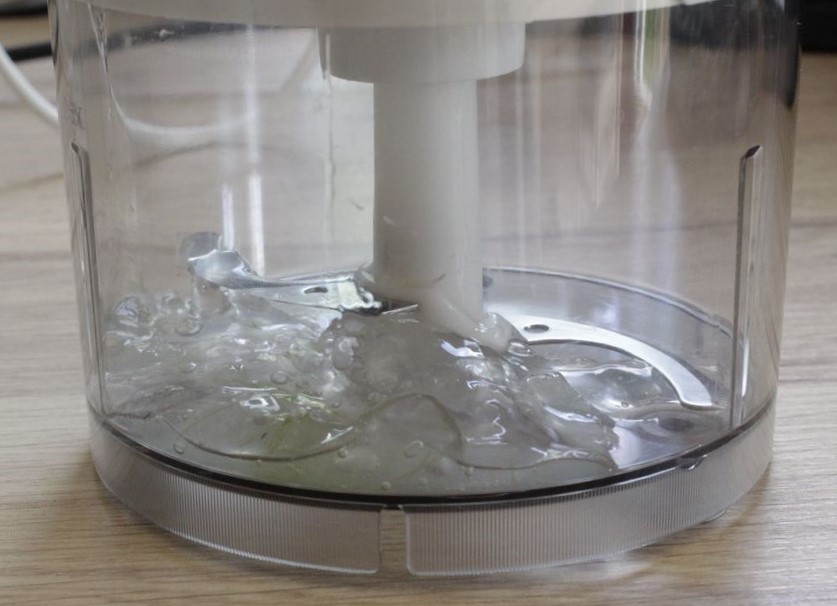
Aloe vera gel in a blender
The aloe vera gel can be homogenized in a blender

7. homogenize the gel in a blender

If you want to obtain a uniform gel or process it further, put it in a blender. This creates a uniform mass that is easy to spread, dose or process on the skin.

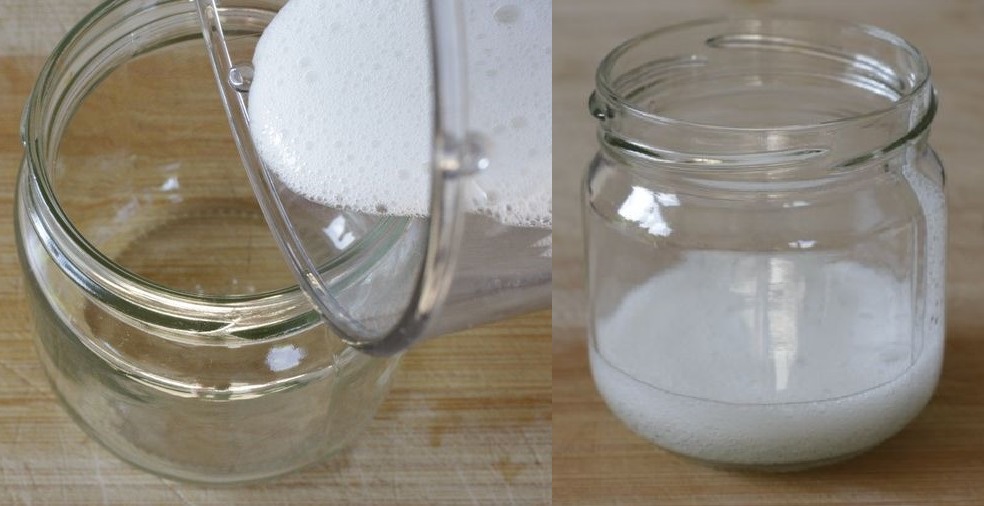
Aloe vera gel, which is filled into a jar
The aloe vera gel is filled into the jar after mixing

8. filling aloe vera gel

Mixing causes the gel to foam up a little. However, the foam will subside after a few hours. You can now pour it into the container you have provided.

Aloe vera gel, which is filled into a jar
This is what the finished aloe vera gel looks like

The aloe vera gel is ready! This is how you can preserve it:

You've done it and now you've made your own aloe vera gel. Please note that this is a natural product. The gel will keep for around 7 days in the fridge. However, you can extend the shelf life by taking the following measures:

  • Freeze aloe vera

    If you freeze the gel, it will keep for several years. When thawing, the mixture may no longer be homogeneous, but this is not a problem. Simply mix it again and it will be a uniform mass again. Pour the pureed aloe vera gel into ice cube trays or a silicone mold and place them in the freezer. Allow the aloe vera gel to freeze completely before transferring it to an airtight container or freezer jar.
  • Adding vitamin C as an antioxidant

    To do this, mix about 1 gram of vitamin C powder into 100 grams of gel. This will keep the gel for one to two months.

When can you start harvesting aloe vera?

The aloe vera plant is ready for harvesting when it has reached a certain size and the leaves are firm and juicy. It usually takes a few months to a year before the aloe vera plant is large enough to be harvested. It is important that the plant gets enough sun and water and that the soil is well-drained so that it can grow healthy and strong. When the aloe vera plant is ready for harvesting, you can carefully cut the leaves with a sharp knife and remove the gel from the leaves. The gel can either be used fresh or frozen for longer storage.

Frequently asked questions about the production of aloe vera gel

Does the plant or leaf have to be at least 3 years old?

No, neither the leaf nor the plant needs to be 3 years old to obtain aloe vera gel. This guideline mainly serves to prevent the plant from not recovering from the removal of the leaf. So if you think the plant is already big enough, there is no reason not to cut off a leaf.

There are crumbs in my aloe vera gel. What can I do about this?

If your aloe vera gel still contains crumbs after thorough mixing, you can press it through a fine sieve.

Will the gel or the active ingredients it contains be damaged by mixing?

It is a misconception that the gel gets too hot during blending and the ingredients are destroyed. On the one hand, the gel does not really heat up during the short blending process. Secondly, the gel, like the plant, is insensitive to these temperatures due to its origin in hot regions.

I froze my gel and have now defrosted it again. Unfortunately, the mixture is no longer homogeneous. Can I make a uniform mixture again?

You can easily create a uniform mass again by mixing the gel again briefly. Adding almond oil simplifies this process and is suitable if you want to process the gel into a lotion.

Where can I get an organic quality aloe vera plant?

You can find an organic quality aloe vera plant in a garden center, a nursery or on the internet, for example. Organic markets often sell organic aloe vera leaves that have already been separated.


Hey,

We hope we have been able to answer your questions and help you with this article.
If you would also like to help us, please leave a review or take a look at our Pinterest account. There are always great DIY instructions on the subject of plants.

Pinterst Icon Pinterest-Account

Was the article helpful?

More articles on this topic:


Space for comments, questions, praise and criticism:

* The links marked with an asterisk (*) are so-called affiliate links. I receive a commission if you purchase via such a link on Amazon. The price does not change for you. Thank you for your support!

©-2024zimmer-pflanzen.com